

 Canada
 Global
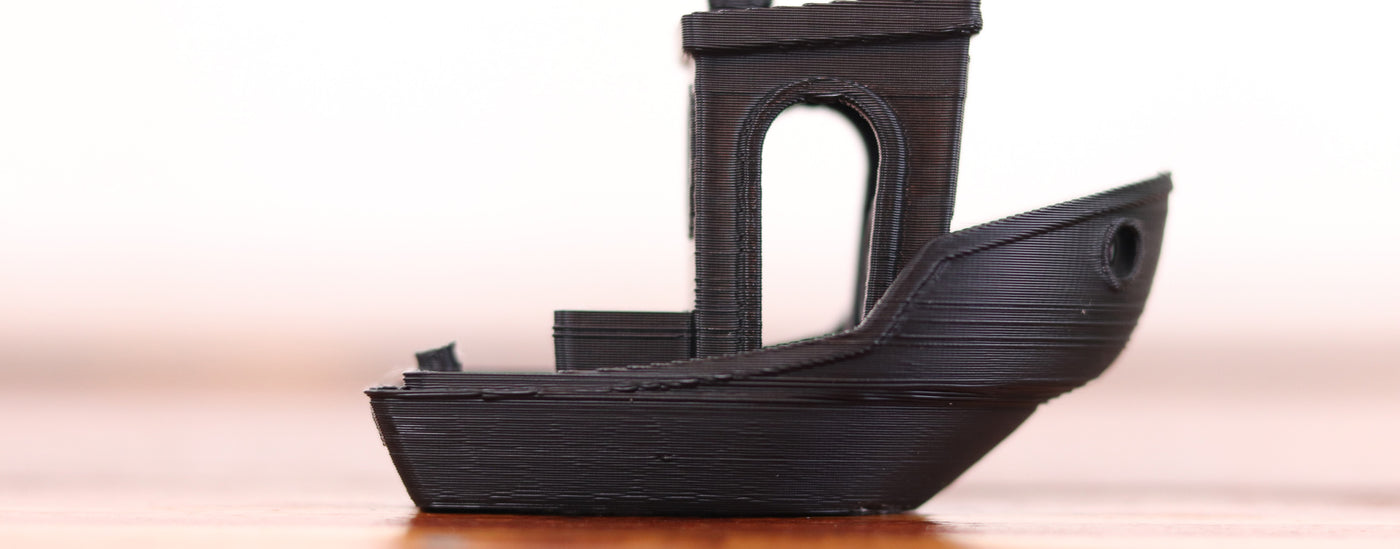
Layer shifts refer to when the print looks fine other than the fact that one or multiple layers are shifted in the X or Y direction. Layer shifts can be something as simple as a loose wire or can be as difficult as recognizing that your stepper motor pulley is not functioning properly.
This can result in a print that has one, or multiple layer shifts.
Single Layer Shift
This issue is normally a bit easier to diagnose and fix than a print with multiple layer shifts.
Obstruction during print.
The most common cause of a single layer shift is that there was an obstruction during the printing process. This can be from tangled or too tightly wound filament, or from a cord that is the way of an axis from moving properly. You will see this occur more frequently on larger prints than small ones.
If you have a filament tangle with one of our spools, make sure you send us an email at Support@Polymaker.com with your order number, and we will issue a refund.
You will want to make sure that your printer has a clear path before starting a print, and that all cords and wires are not in a position to obstruct after moving throughout the entirety of your print area. Confirm your filament is tight on its spool and that you maintain it in a way that will not allow it to tangle. If you have a spool that is becoming unwound during the print, get some Teflon or PTFE tubing and mount it to your frame as tight as possible to help.
Zip tie all cords in a fashion that get them out of the way of the toolpath. Anything in the way of the extruder or build plate that is stronger than your stepper motor will cause a skip, and then result in at least one layer shift.
Endstops in wrong spot, or frame not set up properly
You will run into issues with a single layer shift if you are printing something large and your full print area is not set up properly. If you are using a slicing program where your machine settings are not to the proper dimensions of your printer, the machine will think that it can print further than it actually can. The stepper will skip when your extruder or bed hits its max build area, and the print will continue, assuming that it went the entire tool path.
You can check to make sure everything is set up correctly by homing your machine. When you home the printer and it goes to the very corner of your build plate, you likely have everything set up properly (or the center for printers with a home at center).
When you home the machine, if there is accessible print area in front of or to the side of the build plate (depending on your homing setup), you are not going to be able to use the entirety of your build area.
This can easily be fixed if your X or Y endstop is just in the wrong position by slightly adjusting their location. If these endstops are fixed on your machine, the frame itself may not be set properly. Adjust any t-nuts that may be holding your bed in the position it is in and slide until in the proper homing position. Retighten and make sure nothing can rattle. You need to make sure that your printer homes in the correct spot in order to take advantage of the entire build area. You would never know there is an issue on small prints until you decide to go with a large G-code.
This can also arise if you recently swapped your hotend setup. Your printer is designed to reach its max points with the stock hotend, and if your new hotend or mount pushes the nozzle in any direction from where the stock one was, then you will no longer be able to reach the max build area of your printer. You will need to either relocate your end stops, or adjust your build volume in your slicer to accommodate. Otherwise you will think you can print a larger model than you actually can, resulting in a single or multiple layer shifts.
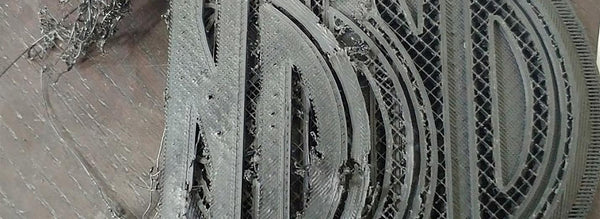
Errors in G-code or model
Essentially files can be corrupted or exported improperly. While in your slicing program check the model layer by layer to see if there are any holes or missing walls. Also be sure to check for actual errors on software such as Cura or the old version Netfabb.
Your G-code can actually be corrupted as well. This is not common but we have had prints that just would not print properly no matter what we did. This normally happens if you transfer a file before it has completely saved.
This is a lot harder to diagnose, but if you have a part that has caused a layer shift in the exact same spot after reprinting, then it is worth your time to reslice and reupload to your machine. It would be very unlikely to experience a layer shift in the same position if it were just caused by an obstruction.
SD cards can also become corrupt. Try formatting your SD card or use a new one if continually having a problem.
Too thick of layer heights – turn combing off/use lines for infill
This should not be an issue when working with standard nozzle sizes and layer heights, but can become an issue when going over 0.4mm layer heights. When we tested out the SuperVolcano with a 1.4mm nozzle and 1mm layer heights, my nozzle would drag over the previously laid infill when traveling.
Turning off combing allowed for the hotend to Z-hop after every movement and avoid this infill. I also switched from triangular infill to lines, in order to avoid the same problem. When we did not do this – we got a layer shift from the nozzle hitting the infill and skipping the stepper motor.
Multiple Layer Shifts
Belts too loose (or too tight)
Belt harnesses on many machines are built in a way that will cause loosening over frequent printing. Some inexpensive machine harnesses only hold the belt tight via a zip-tie, though luckily this has not been as common as of late.
A loose belt will cause slippage and excess play. This is a very common problem when you are using a heavy bed that moves back and forth frequently (you will see frequent layer shifts in the Y-axis).
You will want to make sure your X and Y carriage have belts that are very tight. You can actually over tighten them, but from our experience, a loose belt is far more common than one that is overly tight. If your belt is too tight it may cause binding and ghosting (as covered in that page).
It is smart to print an adjustable belt tensioner for your carriages. This will allow for easy tightening when things get lose over time – otherwise you will likely have to disassemble. Luckily printers like the Ender 3 V2 come with belt tensioners stock, but if yours doesn’t have one, I definitely suggest adding one.
There is no specific measurement to judge if your belts are properly tight, I usually just say you don’t want any droop and want the belt to be springy to the touch. If the belt feels as though it’s stretching and has no real give – you’ve gone too tight.
Bed corners tightened to their max
This is actually far more common than you would think, especially if you are not using a bed leveler. When attempting to get a level build plate you may run into a time that you end up over-tightening one or multiple corners. You do not want these corners at their maximum spring tightness because over time it can actually warp the metal plate. These warps will make your problems even worse.
You will notice an issue when you try to move the Y carriage (on Cartesian setups) with the printer off and stepper motors disabled. When one or multiple corners are over tightened, the bed will be difficult to move.
We suggest starting fresh by loosening all of the corners until they have equal minor tension on the springs. If you now notice a big difference in how easily your bed moves, then this is likely the culprit. Get the Z-rods even by checking the distance differences for the nozzle to the bed in the X direction. Just hold one rod in place while you twist the other, leveling the X-carriage, assuming your printer has dual Z leadscrews.
Only then should you adjust the corners for a level build plate. If you have a very warped metal plate you can experience certain corners that will just not get level no matter what you do. In this instance you will actually need a new metal plate, though a bed leveler may help. This is why you do not want to leave any corner over-tightened for long periods of time. You will be slowly putting pressure on an item that may get bent over time. Using a thicker ¼”glass build plate helps to make this issue less common. The flatter your build plate is, the easier it will be to avoid this issue.
Dry rods or broken bearings
Most printers have self-lubricating bearings for their carriages, but even those can get dry over frequent machine use. This is for printers moving over smooth rods, such as with Prusa. If you are having difficulty manually moving the X or Y axis when the machine is not printing and stepper motors are disabled, check to see if the rods are extremely dry or that the bearings are not broken. A broken bearing is easily replaced and a dry rod can be fixed with some white lithium grease. Also check to make sure that the rods themselves do not have scarring from the bearing wearing down. If the rod is heavily scratched, then that may need to be replaced as well.
Just rub a minor amount of white lithium grease to the rods (both threaded and smooth) and then move the carriages around so that it spreads. If you notice a drastic increase in smooth movement of your axes, then you may have fixed your issues of multiple layer shifts.
Reapplying lithium grease and checking the resistance on the rods/bearings is good practice regardless of experiencing layer shifts, since it can help to allow for consistent clean prints.
If you have a printer that has rollers moving over aluminum extrusions, such as the popular Ender 3, then you will want to make sure your rollers aren’t clamped too tight to the frame. These rollers being too loose is more common, but if your rollers are clamped so tight that it reduces movement, then you will want to loosen it slightly.
These rollers are held on by a nut on one of the rollers. This nut does not tighten when turned clockwise and loosen when turned counter clockwise. Instead one side of the nut will result in a loose carriage, one side in a tight carriage. So if you do a full 360 degree turn of this nut, you will be right back at your starting point. If you notice that the rollers are held on too tight, give the nut a 90 degree turn and then test again. You don’t want the rollers free spinning, so make sure it is tight enough to not have free play but still be able to roll smoothly.
Bent rods
Rods, especially thin threaded 5mm Z-rods, can become bent over time. This bent rod can cause one or multiple layer shifts as the carriage or bed travel over these bends.
If you notice any rods that are bent, replace them immediately.
Acceleration or speeds too high
Your motor’s torque at a given speed must be greater than the force needed to accelerate or decelerate the carriage at a given acceleration rate and maximum speed. If you require a higher torque than the motor can supply at that given speed or acceleration, the layers will shift via the motor skipping.
Most printers do not have the acceleration settings on the LCD screen anymore, but some do. That said – it is much easier now to just edit your acceleration settings in the slicer itself. Most slicers, including Cura, have this ability to edit your accelerations in the “Speed” section. You likely do not want this number over 1000 when working with Cartesian machines.
There is an exception to this now with the new fast printers on the market such as those offered by Bambu Lab. But if you do not have one of these fast machines, we do not suggest going above that 1,000 number. CoreXY and Delta machines can get much higher depending on the build quality. Manually reduce this number and see if it helps. CoreXY machines can handle a higher acceleration than Cartesian, meaning we have our CoreXY (non Bambu Labs) set to between 1000 and 1500. Delta machines can handle up to 3,000 without much of an issue. You can obviously increase from these numbers if you know your printer can handle it, such as many of the new Voron builds or new Bambu Lab options.
Stepper still skips
If your stepper still skips, you may have a malfunctioning motor or have wiring issues. Check the connectivity for each wire going from your stepper to your board. If there is a break somewhere you will have to replace it or cut it and rewire. Sometimes one wire will be connected, and then become disconnected upon certain movements, since it is frayed or damaged. This will cause the stepper motor to not turn properly, and then turn properly again once the wire has continuity again. Make sure every wire from your stepper to your board had proper continuity.
The stepper or driver itself may be malfunctioning, so try switching the connectivity to a different axis and see if the motor still skips when moving that axis. If it does, replace the stepper to fix your layer shifting and skipping issues. If it ends up your stepper driver is malfunctioning, you can easily replace that. If you have a printer such as the Ender 3 where the stepper is integrated, you unfortunately would need a whole new board. Make sure you confirm it is the stepper driver though before going this route, and not just the stepper or a continuity issues.
It also may be worth re-flashing your firmware or going back to factory settings if this issue came out of nowhere. Flashing firmware has become much easier on machines such as the Ender 3 V2. For those machines you would just search on Creality for the most recent firmware for your particular board and printer, download and unzip the .BIN file, then transfer that .BIN file to your SD card. Turn your printer off, put in the SD card, and then turn the printer on. Your printer will now flash the most current firmware. Remember that anything you changed will now go back to factory settings, such as the E-steps. This method is only possible with newer printers, such as the Ender 3 V2, but not possible with the older version 1. For something like the Version 1, you will need to bootload, which there are tutorials online for.
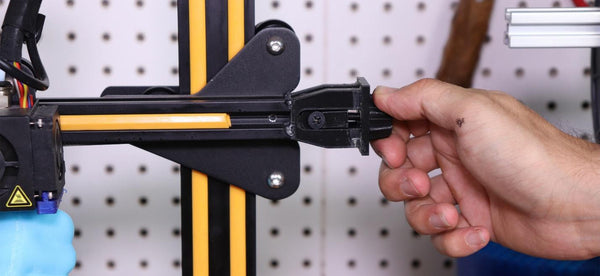
Cheap or worn-out pulleys
Pulleys for your motors need to have sharp defined teeth with the proper spacing in order to work properly moving your belt the correct amount of steps. They also need to be tight on the stepper motor shaft, since any slippage on this will cause a layer shift.
If you buy a poorly made pulley, or notice that yours have had the grooves worn down, you will want to upgrade and purchase a new set. Go for products made from aluminum or stainless steel made products, since small items such as this are not that much more expensive, and can make a huge difference. If you do purchase a new pulley, make sure it has the correct amount of teeth. If you replace a pulley with the improper amount of teeth, your parts will all be to very incorrect dimensions or cause further layer shifts.
Confirm pulleys are tight on the stepper motor shaft
Your stepper motor pulley is held onto the stepper motor shaft via a grub screw (also called a set screw). If this set screw is not tightly holding the stepper motor pulley, then the stepper motor itself can turn without turning the pulley, or just slip slightly from time to time. This means that your printer will think it’s moving, but the belt isn’t turning, or at least not the proper amount.
Make sure that your grub screw is tightly holding the pulley onto the stepper motor shaft and that there isn’t any free play at all. If there is still free play even when you tighten, replace the grub screw or replace the pulley itself until it can be held on as tight as possible.
Bed too heavy
This normally is not an issue if you have your drivers putting out the proper current and everything is lubed, but if you have an abnormally heavy bed you may experience shifts in the Y-Axis (on Cartesian machines - this should not happen at all on a CoreXY machine.). If you are trying out an experimental bed with a lot of wiring and extras on top of a ¼” thick glass bed, this axis may have difficulty moving without experiencing some layer shifts.
For this issue, you will either need to replace your build plate to be a lighter one or check the VREF on your Y stepper motor to confirm it is sending enough power. If you confirmed your VREF is correct, other than replacing to a lighter build plate, you would need to swap the Y stepper motor be a more powerful one.
This really hasn’t been an issue for us in a very long time, so make sure you confirm that the build plate can move freely when stepper motors are disengaged before thinking this is the culprit.
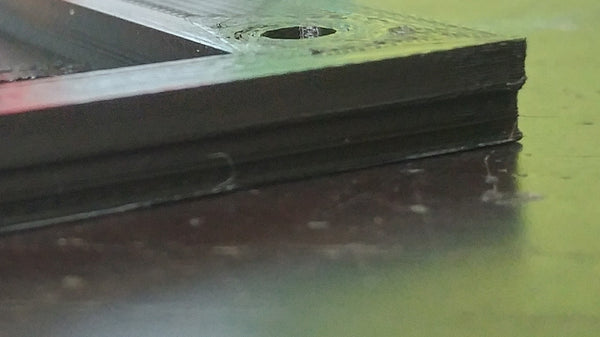
Running into the print
A less common problem with layer shifting can be when the printer head runs into the layer it just printed. This can cause a skip in the motor and will have the print continue where it left off. You are more likely to get a print knocked off the build plate in this occurrence, but sometimes it can cause a layer shift if the part is stuck to the build plate extremely well.
This is most common when you are over extruding at very low or very high layer heights with a very strong bed adhesion.
You will want to add a Z-hop to that of your layer height, that your hotend is assembled tight and not oozing, and you will want to make sure you have your printer head avoid printed parts in your slicer settings. As mentioned earlier in this page, if you are printing at very large layer heights, you may need to tweak your infill pattern and turn off combing.
Z-hops aren’t recommended for inexpensive machines, so first try using the “Avoid printed parts when traveling” in your slicer. If you still get your nozzle hitting your print, then you can try adding a Z-hop.
Z-wobble
Some may consider Z-wobble in the class of layer shifts, but I have it as its own category. If you are experiencing a wobbly looking print in the Z-Axis (never ending extremely small layer shifts), please refer to the “Z-Axis Wobble” page.
Summary of Fixes and Precautions
• Clear the printing path of your carriages from any obstructions. – Zip tie all wires and loose cords, and maintain a clean printing area.
• Confirm end stops are in the correct spots and that the frame is built correctly so that when you home the nozzle it is in the furthest part of the corner that it can be.
• Check for errors in model or reslice if G-Code is corrupted.
• Increase Z-hop, turn off combing, use lines for infill to prevent nozzle from hitting the print on large layer heights. This should only be relevant for very large layer heights.
• Make sure belts are tight enough (but not too tight).
• Do not over tighten bed corners.
• Make sure the rods are not dry or that any bearings are broken.
• Replace any bent rods.
• Reduce your acceleration and/or speed.
• Increase the current going to your stepper drivers by checking the VREF.
• Check to see if your stepper or drivers are malfunctioning or overheating.
• Make sure your pulleys are attached tight to your stepper motor shaft and cannot spin freely.
• Replace or upgrade your pulleys.